Email clients are an excellent way of communication for the users in an organization. But it happens when the need arises to switch from one email client to another. One such switching of email client is from Windows Live Mail to MS Outlook.
The tutorial is fully dedicated to informing people how they can easily transfer Windows Live Mail emails to Outlook in a simpler and comfortable manner.
Table of Contents
ToggleAbout Windows Live Mail
Windows Live Mail is a desktop-based email client that stores the database in EML file format. EML which is a single file format and stores only emails & attachments. It is not only WLM support EML files, however, but it is also supported by various email clients like Thunderbird, Outlook Express, etc.
About Microsoft Outlook
Outlook is also a desktop-based email client which is most preferred by the users due to its advanced features. Outlook utilizes PST files to store all its data. Not only emails & attachments but also contacts, calendars, notes, journals, and other information are stored in PST files.
Reasons to change Windows Live Mail to Outlook client
There are several reasons behind the migration of WLM emails and attachments to Outlook –
- MS Outlook works as a personal information manager where you can easily manage all your contacts, events, meetings, etc.
- Outlook provides users with the functionality to work in offline mode.
- Outlook secures all its databases from viruses and other malware.
- Outlook provides you the facility to organize emails in your way.
- MS Outlook has a friendly interface so it can be easily handled by the users.
How to convert WLM emails to Outlook?
You can follow the step-by-step tutorial to effectively migrate Windows Live Mail data to MS Outlook –
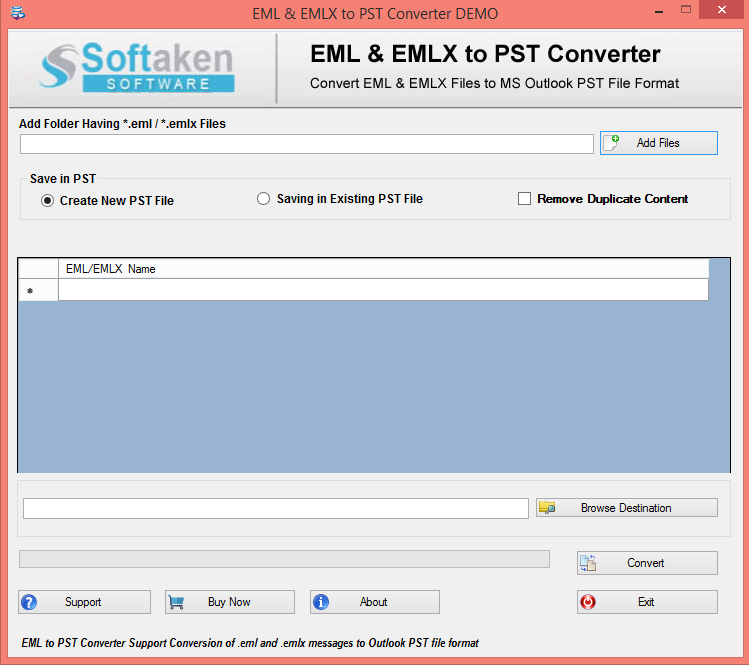
Step 1. Download and install the application – Freshly download the software on your Windows machine. The opening interface of the software is displayed in the image below.

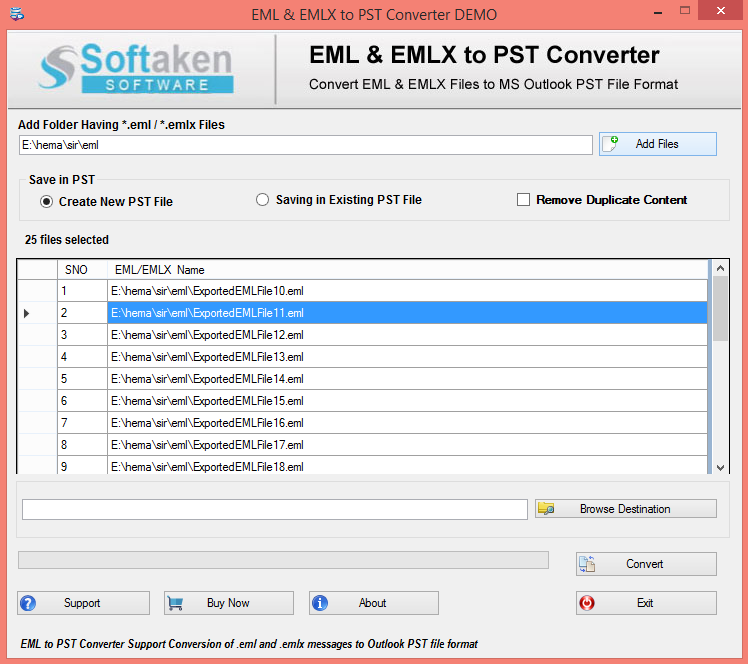
Step 2. Loading EML files – Click on Add files. Choose EML files from your hard drive where you have your EML files stored.
Save in PST
There are two options available. Choose one from them whether you want to create a new PST file or save an existing PST file.
Remove Duplicate content – Tick marks the option to remove duplicate emails from the loaded EML files.

Step 3. Entire broadcasting of loaded files – Once you load the required EML files, a clean and clear preview of the loaded files is shown which will help you to check the exactness of the files.
Step 4. Provide output directory – Go to the Browse destination and choose a location where you want to save the resultant files.
Step 5. Click on the Convert button – Finally, click on the Convert button. After a wait of a few minutes, you will get the successful conversion of EML files to PST format.
Steps to import PST file to Outlook client
- Go to File menu > Open & Export > Import/Export
- Select Import from another program or file, click Next
- Select Outlook data file (.pst), then click Next
- Browse the PST file, click Next
- Choose the account where you want to place the PST file
- Click Finish
